Now all this being said, one thing I have always not had a good solution for is backing up my iTunes and iPhoto library. I use dropbox to back up all my other important files and documents but my iTunes and iPhoto library are too big for that service, it is doable but too expensive... My current solution for backing up my iTunes and iPhoto library is kind of a kludge and manual process. First I keep 4 copies of all of my pictures on different hardrives one in iPhoto on the main drive, one in Picasa on a external drive, one online through google Picasa Web Albums and the last one on an external harddrive that I keep outside of the house(in case of theft or fire). On that external harddrive I also keep a back up of my iTunes library. But the hard part is keeping that external harddrive up to date. For a while now I have been thinking about taking an Apple TV 1gen and adding a bigger harddrive. Because of its auto sync functionality I would not have to remember to update it with my latest files as long as it is in range of my wifi network. I could also take it with me when we go on road trips and connect it to the tv in the trailer or at my wife's parents house. Now the problem is, "it is easier said than done" to add a bigger harddrive to the ATV1 so here is a step by step guide on how I did it. This is based on a lot of research on how other people have accomplished the same goal but with my own twist.
Step one is to open up the ATV1. (If you don't have one yet or want one to experiment on like me, you can find them on ebay for around 50 bucks.) At first look there are no screws but under the rubber bottom they are there. Now there are a few options including pealing back the rubber bottom but I like one guys idea to use an exacto knife to cut around the screws. http://www.xlr8yourmac.com/tips/AppleTV_HD_Upgrade/AppleTV_HD_UpgradeGuide.htm
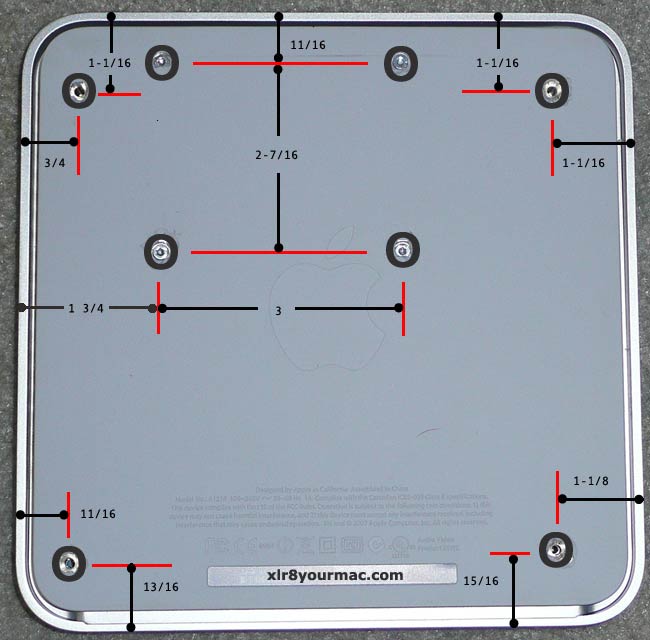
You can also push on the bottom with your finder to feel the screws. You will need a Torx T9 and T8. to get the screws out.

The 4 corner T9 screws are the ones that connect the top to the bottom and the 4 inside T8 screws help hold the HD to the bottom of the case.
Be careful when you open it up because the HD cable is connected to the mother board that is attached to the top of the case.
Techrepublic.com has a good step by step tear down with pictures.
Step 2 - on to the good stuff now the issue with the ATV1 is that the hardrive is the old style IDE connector. You can only get a 320gig 2.5" IDE harddrive. So you need an adaptor to convert it to SATA interface. There are a few out there but the best one I have found that has worked consistently and is small enough.


Part # is PCM-233B-00A1E and can be ordered from Advantech.com for $26.00
Step 3 - you need a HardDrive. I went with the new 1TB Western Digital 5400 RPM 9.5mm Laptop Hard Drive but any 2.5" laptop hard drive will work.

You can get it from newegg.com for $134.99
Step 4 - you need to prepare the HD and load the ATV1 OS on it. Again there are lots of ways to do this but the method I went with seemed the most strait forward to me.
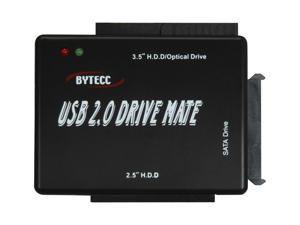
a. you will need a usb to IDE adaptor and a usb to SATA adaptor. There are combo units out there like this one that you can get at newegg.com for $16.99
b. you need to download AtvCloner from dynaflashtech.net/atvcloner/ it is free but requires a mac running leopard or snow leopard. After you download and start the application connect your old ATV1 HD and click "Scan All Disk" then "Choose..." the ATV1 HD then click the "Image Source Partitions..." This will create 3 dmg files on your desktop. (efi, recovery, and boot)

c. Connect your new HD click "Scan All Disks" again then choose all the file locations and if you HD is larger than 500gigs it is recommended to check the "Large Disk" option. Last click "Prepare New Drive.." to copy over the dmg files to the new HD.

Refer to AtvCloner's website if you have any problems or for more in depth instructions.
Step 5 - connect up the adaptor and hard drive.


Step 6 - fitting it all back in the case. There are a number of ways people have done this, the main one being cutting out the metal support bracket from the cpu fan down. But it is a very tight fit along with other issues with over heating and things shorting out from touching the metal case. So my solution was to make spacers and increase the height 10mm's. This solution not only works well but looks good too.
In order to do this you need four spacers and 4 screws that are 10mm longer

The screws are M3x25mm .50 pitch and M3x20mm .50 pitch you local hardware store should carry them for less than 20 cents each. Next are the spacers. I know the owner of a local machine shop so he was able to create them out of some spare aluminum stock. They are 10mm high.


Now the key is with this extra room you can now attach the HD back to the bottom backwards with one screw to hold it in place. Remember to reuse the green pad from the old HD and the gray one.
The green one insulates the HD from the bottom of the case and the gray one helps keep the little hole in the HD case that says do not block from getting blocked.


Step 7 - close it all back up.


And there you have it a 1TB ATV1. A little taller but gives you extra ventilation which is a good thing considering how hot they get. No joke you could probably cook an egg on one.
One more thing. If you were not planning on moving your ATV1 very often you could also use the same build but connect an external eSATA HD for even more storage for the same price 3 to 4 TB
All you need is this cable from CPUStuff.com for a few bucks.

Then you can do this.


